
반응형
문제
1. title : 제목 없음 - 메모장
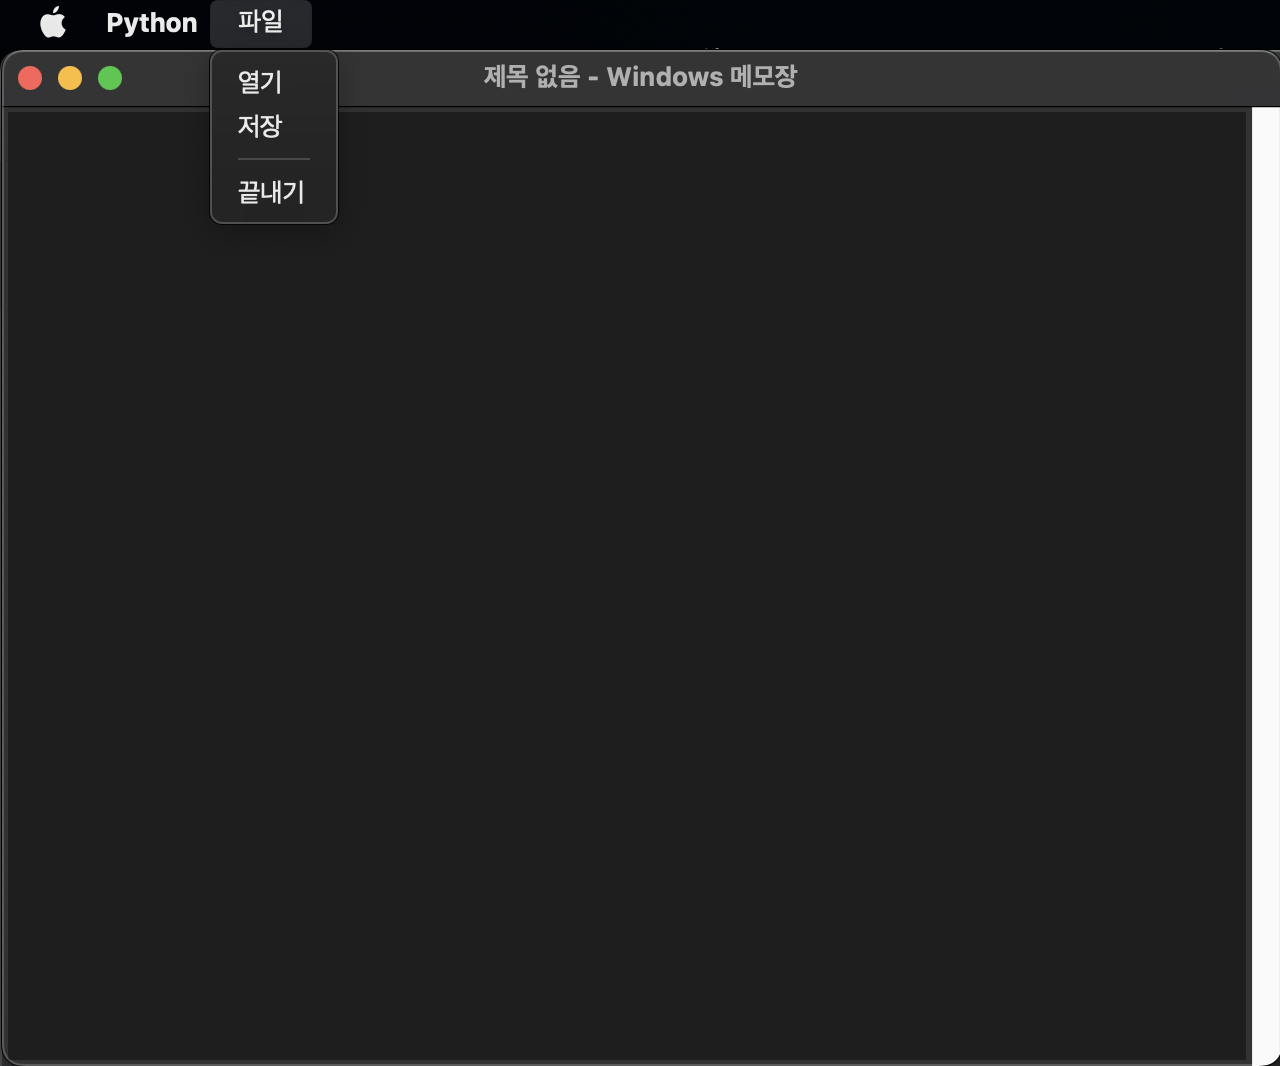
2. 메뉴 : 파일, 편집, 서식, 보기, 도움말
3. 실제 메뉴 구현 : 파일 메뉴 내에서 열기, 저장, 끝내기 3개만 처리
3-1. 열기 : mynote.txt 파일 내용 열어서 보여주기
3-2. 저장 : mynote.txt 파일에 현 재 내용 저장하기
3-3. 끝내기 : 프로그램 종료
4. 프로그램 시작 시 본문은 비어 있는 상태
5. 하단 status 바는 필요 없음
6. 프로그램 크기, 위치는 자유롭게 하되 크기 조정 가능해야 함
7. 본문 우측에 상하 스크롤 바 넣기
기존의 window용 코드
import os
from tkinter import *

root = Tk()
root.title("제목 없음 - Windows 메모장")
root.geometry("640x480") # 가로 * 세로

# 열기, 저장 파일 이름
filename = "mynote.txt"

def open_file():
    if os.path.isfile(filename): # 파일 있으면 True, 없으면 False
        with open(filename, "r", encoding="utf8") as file:
            txt.delete("1.0", END) # 텍스트 위젯 본문 삭제
            txt.insert(END, file.read()) # 파일 내용을 본문에 입력

def save_file():
    with open(filename, "w", encoding="utf8") as file:
        file.write(txt.get("1.0", END)) # 모든 내용을 가져와서 저장

menu = Menu(root)

menu_file = Menu(menu, tearoff=0)
menu_file.add_command(label="열기", command=open_file)
menu_file.add_command(label="저장", command=save_file)
menu_file.add_separator()
menu_file.add_command(label="끝내기", command=root.quit)
menu.add_cascade(label="파일", menu=menu_file)

# 편집, 서식, 보기, 도움말
menu.add_cascade(label="편집")
menu.add_cascade(label="서식")
menu.add_cascade(label="보기")
menu.add_cascade(label="도움말")

# 스크롤 바
scrollbar = Scrollbar(root)
scrollbar.pack(side="right", fill="y")

# 본문 영역
txt = Text(root, yscrollcommand=scrollbar.set)
txt.pack(side="left", fill="both", expand=True)
scrollbar.config(command=txt.yview)

root.config(menu=menu)
root.mainloop()
내가 수정한 Mac 용 코드
import os
from tkinter import *
import platform
root = Tk()
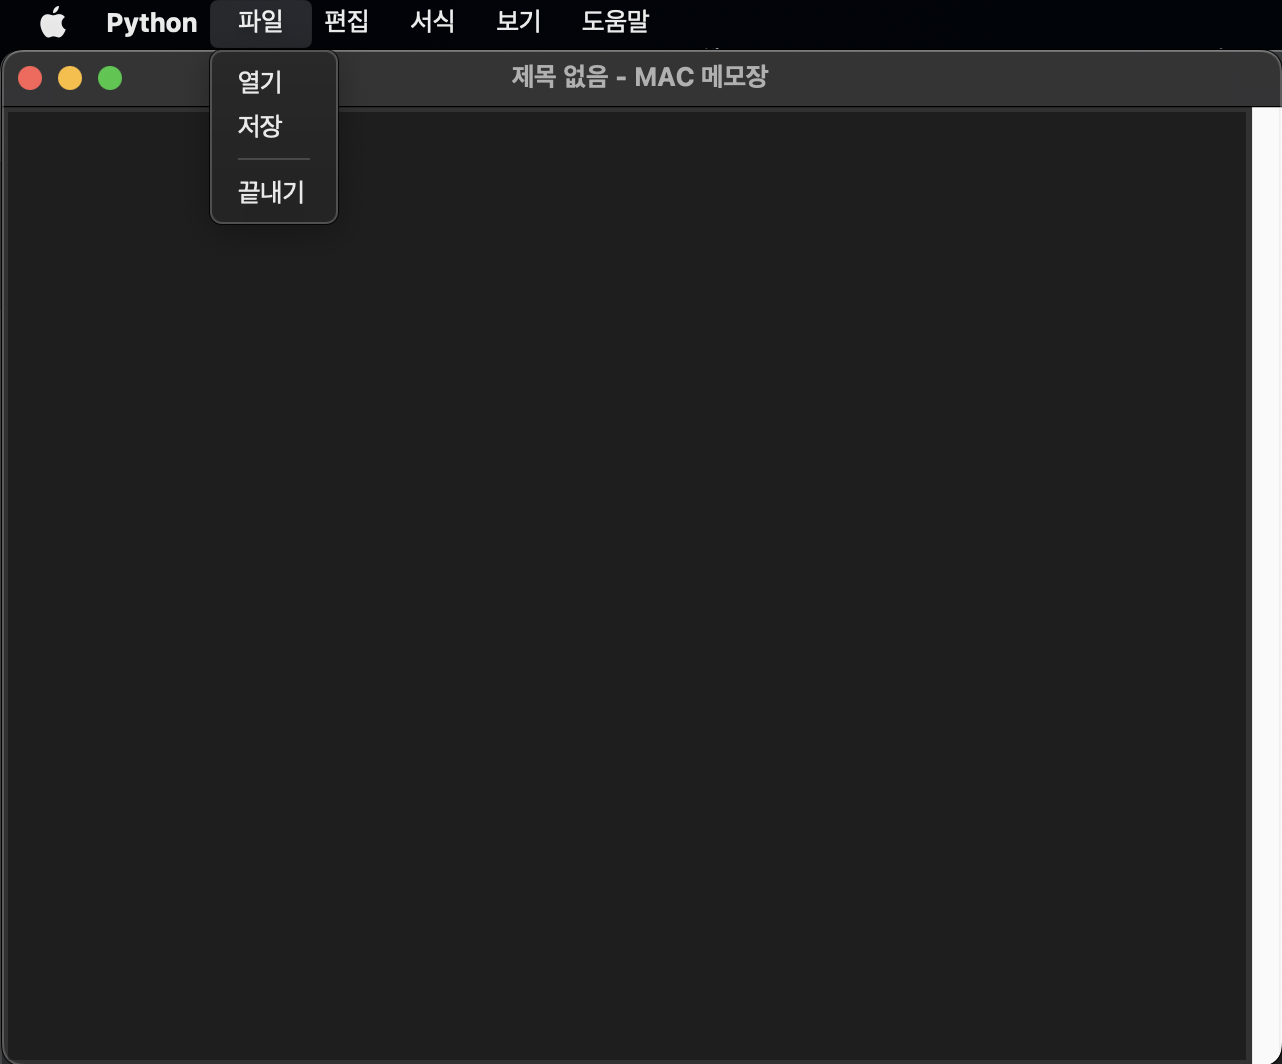
root.title("제목 없음 - MAC 메모장")
root.geometry("640x480") # 가로 * 세로
# 열기, 저장 파일 이름
filename = "mynote.txt"
def open_file():
if os.path.isfile(filename): # 파일 있으면 True, 없으면 False
with open(filename, "r", encoding="utf8") as file:
txt.delete("1.0", END) # 텍스트 위젯 본문 삭제
txt.insert(END, file.read()) # 파일 내용을 본문에 입력
def save_file():
with open(filename, "w", encoding="utf8") as file:
file.write(txt.get("1.0", END)) # 모든 내용을 가져와서 저장
menu = Menu(root)
menu_file = Menu(menu, tearoff=0)
menu_file.add_command(label="열기", command=open_file)
menu_file.add_command(label="저장", command=save_file)
menu_file.add_separator()
menu_file.add_command(label="끝내기", command=root.quit)
menu.add_cascade(label="파일", menu=menu_file)
menu_edit = Menu(menu, tearoff=0)
menu_edit.add_command(label="편집")
menu.add_cascade(label="편집", menu=menu_edit)
menu_format = Menu(menu, tearoff=0)
menu_format.add_command(label="서식")
menu.add_cascade(label="서식", menu=menu_format)
menu_view = Menu(menu, tearoff=0)
menu_view.add_command(label="보기")
menu.add_cascade(label="보기", menu=menu_view)
menu_help = Menu(menu, tearoff=0)
menu_help.add_command(label="도움말")
menu.add_cascade(label="도움말", menu=menu_help)
# 스크롤 바
scrollbar = Scrollbar(root)
scrollbar.pack(side="right", fill="y")
# 본문 영역
txt = Text(root, yscrollcommand=scrollbar.set)
txt.pack(side="left", fill="both", expand=True)
scrollbar.config(command=txt.yview)
root.config(menu=menu)
root.mainloop()에러의 이유를 찾아봐도 나오진 않아서 직접 여러 번 수정하면서 찾아봤다.
MAC OS에서는 menu.add_cascade()를 설정해도 안에 add_command()를 통해 추가된 항목이 없으면 메뉴가 나타나지 않는다. 따라서 각각의 편집, 서식, 보기, 도움말에 아래 메뉴로 똑같은 메뉴를 추가하니 구현이 가능했다. 혹여나 나처럼 실습 프로젝트를 할 때 이와 같은 문제를 마주한다면 이렇게 해결하는 방법도 있다는 것을 알려주기 위해 작성하였다.
반응형
'기타 > Python' 카테고리의 다른 글
| [Python] 랜덤함수 (0) | 2023.06.23 |
|---|---|
| [Python] GUI를 활용하여 이미지 합치기 프로그램 만들기 (0) | 2023.03.26 |
| [Python] GUI 프로그래밍 기본 개념 익히기 (0) | 2023.03.24 |
| [Python] Pang 게임 만들기 - 나도코딩 (0) | 2023.03.24 |
| [Python] 악마 피하기 게임 만들기 - 나도코딩 (0) | 2023.03.23 |